Visitors and the InstaMed gateway
This topic describes the process that visitors complete to register for your paid events if you set up a payment gateway through InstaMed.
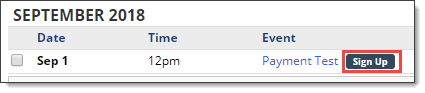
Part 1: Sign up
On the main calendar, the visitor finds the event and clicks Sign Up. (In some calendar views, the visitor needs to open the event details page for access to the Sign Up link.)
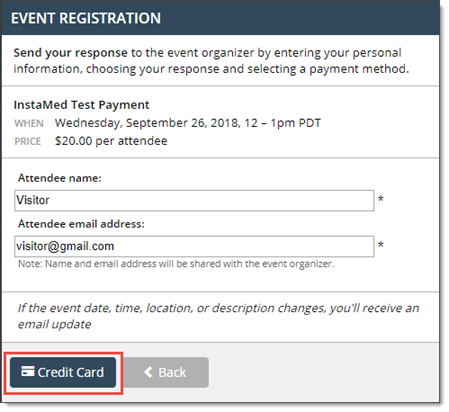
Part 2: Submit payment by credit card
The visitor, following the on-screen prompts:
- Enters their name and email address, and then clicks Credit Card.
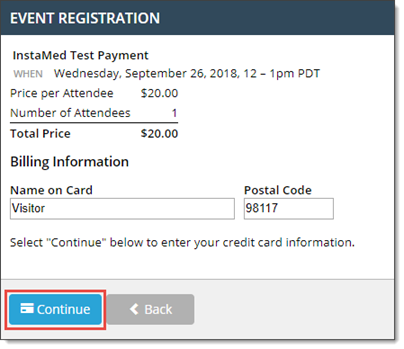
- Enters the name on their credit card and Postal Code, and then clicks Continue.
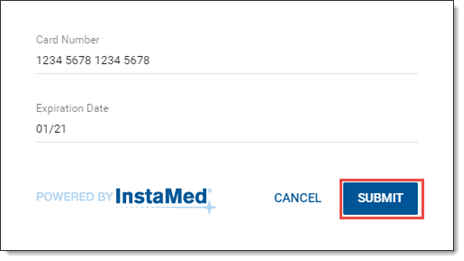
- Enters their credit card number, and then clicks SUBMIT.
Part 3: Receive confirmation
- After the visitor completes the payment process, Trumba displays a confirmation page with a Payment Transaction ID, a link to print the page, and a button to add the event to their personal calendar:
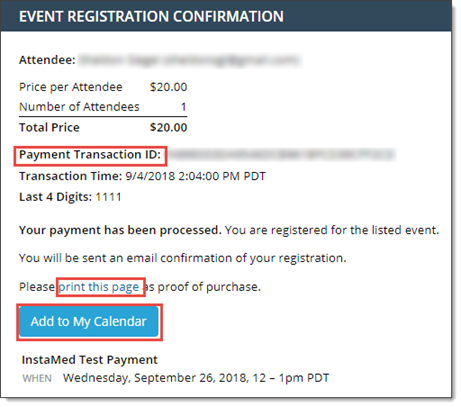
- A confirmation email is also sent to visitor's email address.
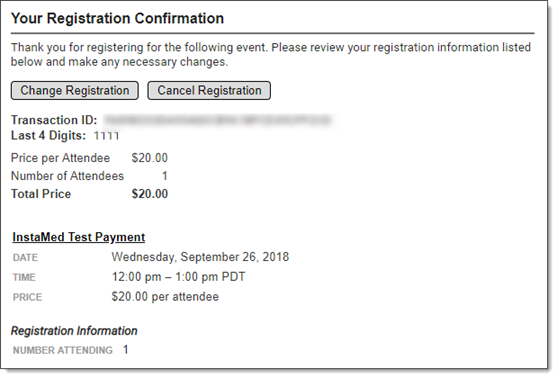
Note If you enabled auto-refunds on cancel when you set up the event, the confirmation email includes an option to cancel the registration, such as shown above.